


Gluten Free Sourdough Cinnamon Pull-Apart Bread
Similar to the cinnamon roll, but baked in a loaf pan! You can let it rise in the fridge, which makes it perfect for those slow holiday mornings.

"May and October, the best-smelling months? I’ll make a case for December; evergreen, frost, wood smoke, cinnamon."
Lisa Kleypas
The Naked Pear is a reader-supported publication. Your paid subscriptions enable me to continue creating and sharing delicious, gluten-free sourdough recipes. Each recipe is carefully tested and perfected, often over the course of years. By subscribing, you'll gain access to my complete collection of recipes and help support ongoing recipe development.
Have you ever watched a recipe trend and immediately been disappointed that you would never try it, because obviously it can’t be done without gluten? This has happened to me many times over the last couple of decades. However, I am happy to say I now see them more as a challenge than an impossibly. Once such recipe is for pull apart bread. I love watching the videos of people pulling apart the gooey layers to reveal the lovely filling, savory or sweet, they are all tempting!
This holiday season, I give you a gluten free sourdough version of a sweet pull-apart bread. It is packed with cinnamon and smells of the season. It is gooey and lovely and everything I imagined those wheat versions of pull-apart bread to be!
RECIPE
Makes 1 standard size loaf
INGREDIENTS:
1 recipe dough and filling from the link below:
Gluten-free Sourdough Cinnamon Rolls
Icing:
150 grams powdered sugar
3-4 Tbs heavy cream
Method:
Make dough from Gluten-free Sourdough Cinnamon Rolls , cover and set aside for 1-2 hours.
Mix up filling from Gluten-free Sourdough Cinnamon Rolls.
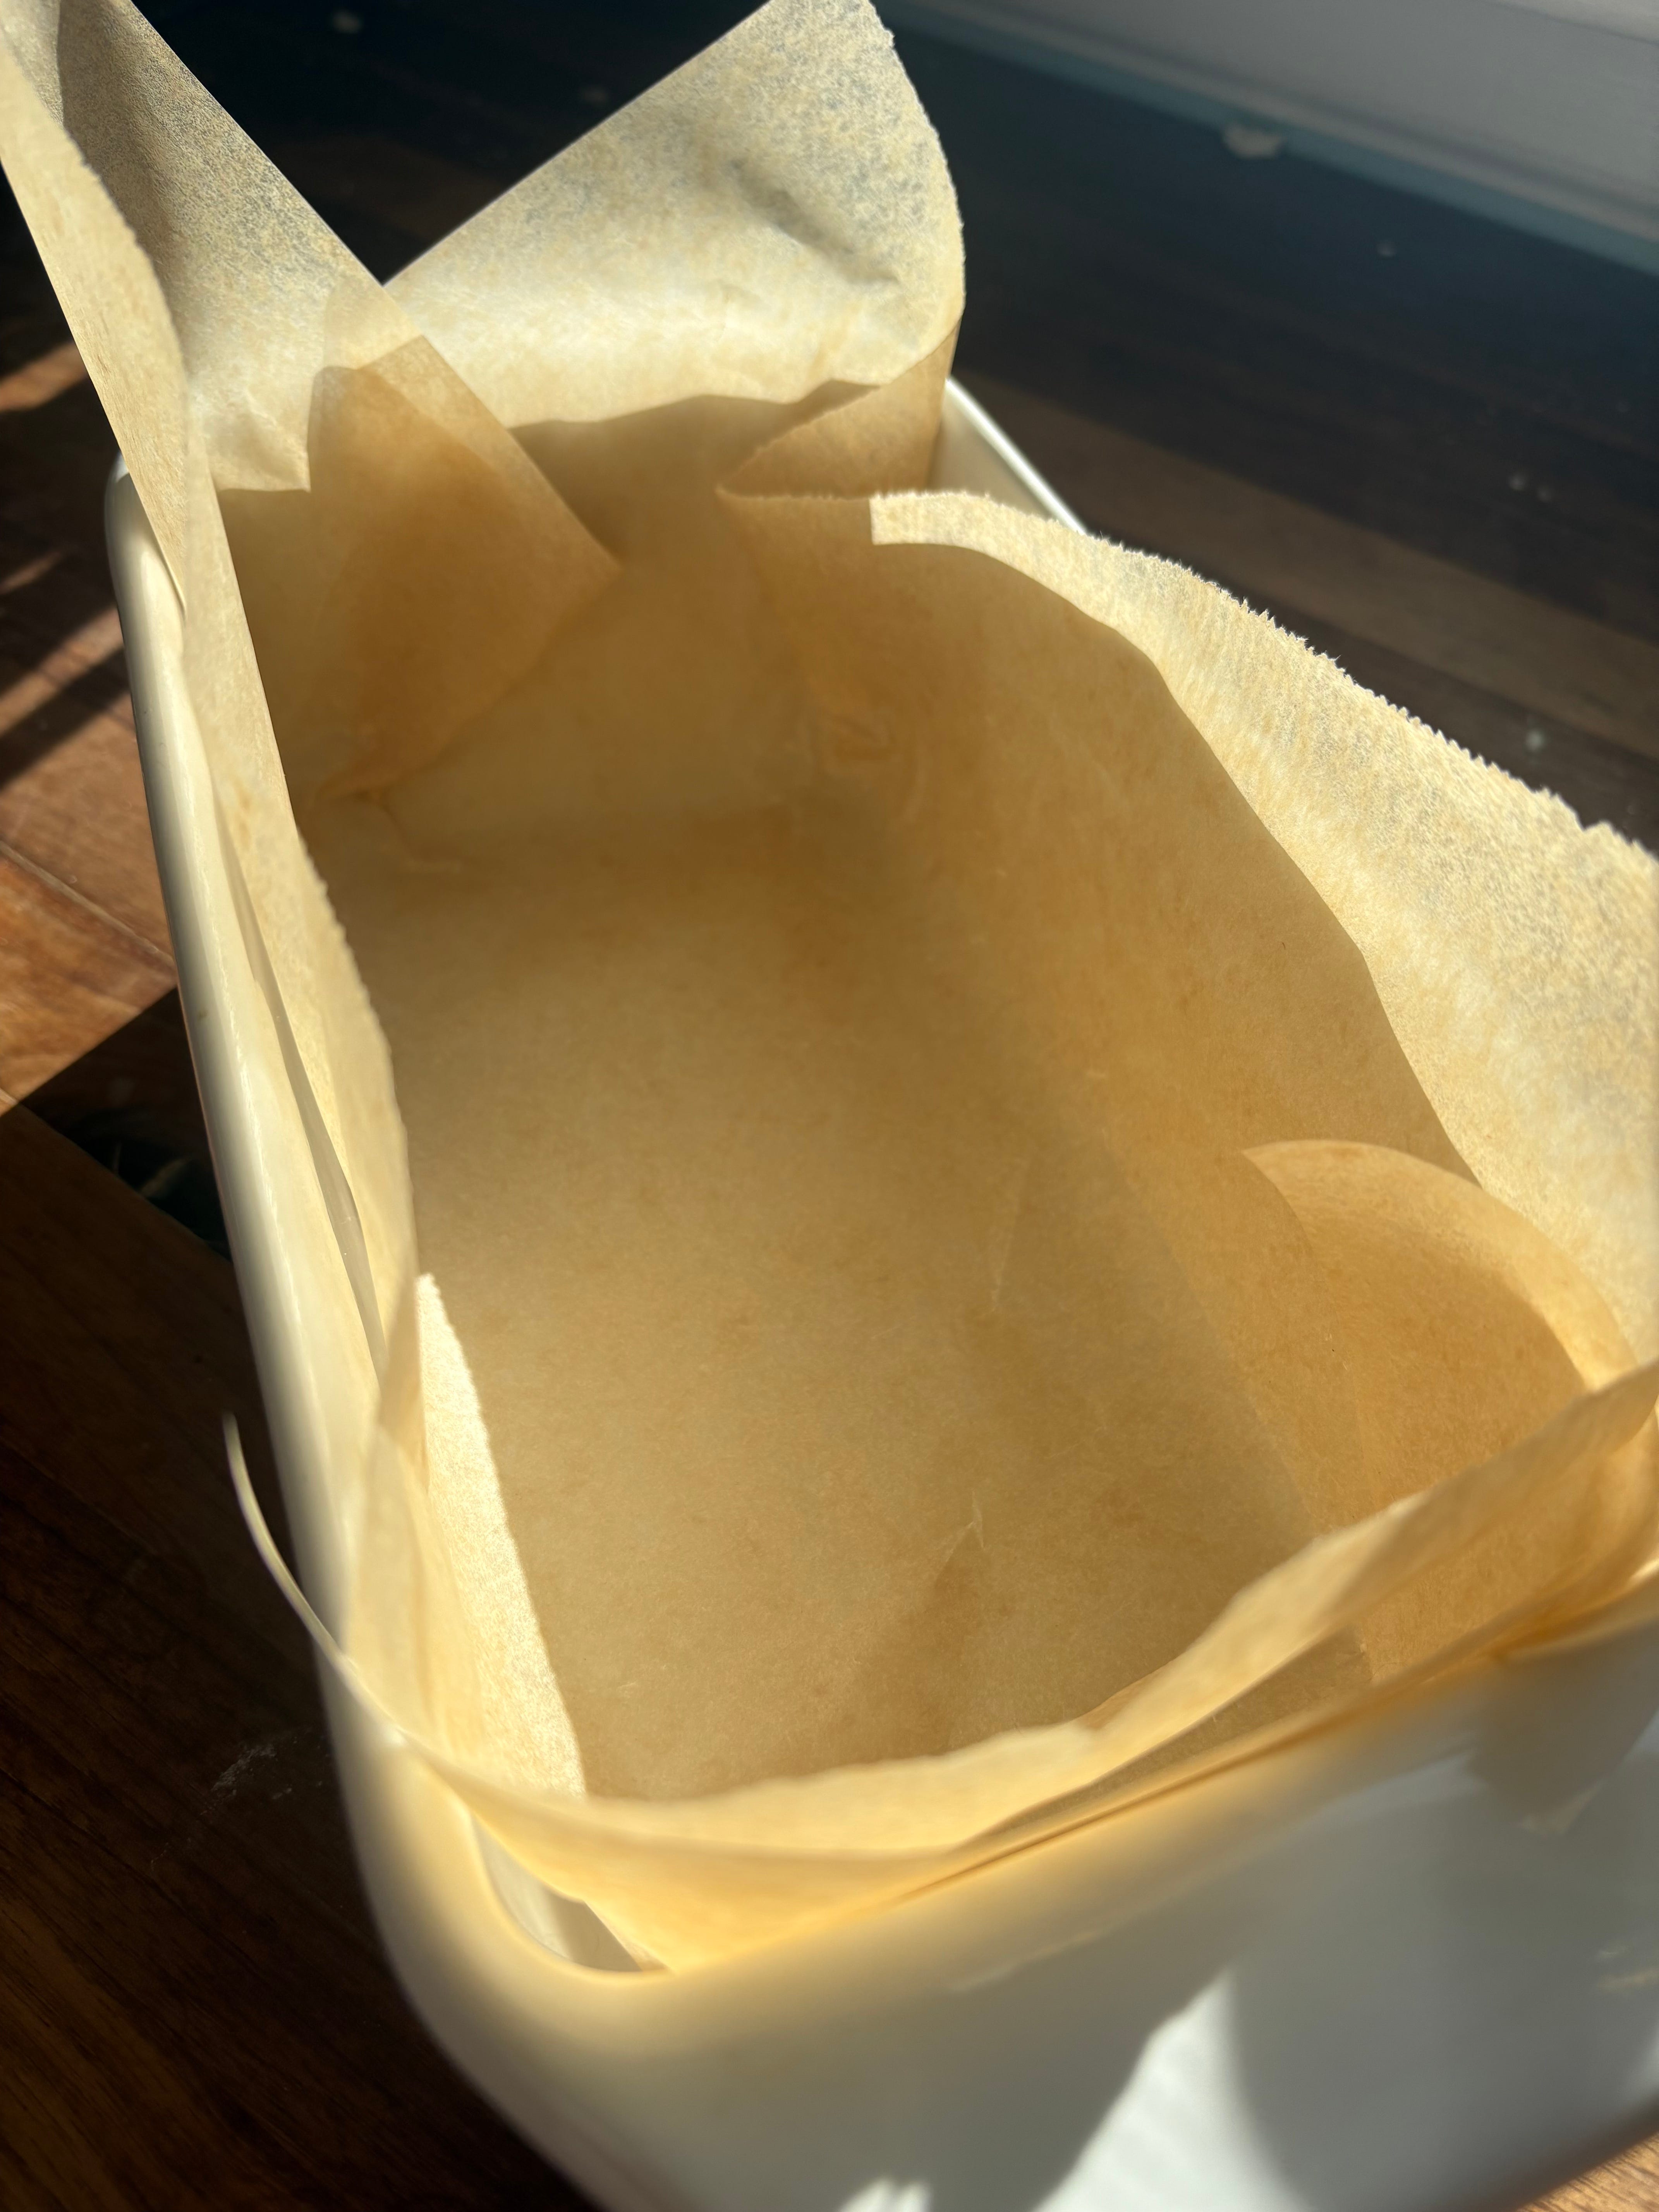
Line a loaf pan with parchment paper.
Sprinkle a bit of tapioca starch on a piece of parchment paper (at least 20 inches x 12 inches). Sprinkle a small amount of tapioca starch on top of your dough. With a rolling pin, gently roll into a rectangle approximately 20 inches long by 12 inches wide. Your dough should be very easy to work with and not sticky.
Spread your soft filling evenly over your dough. Make sure you spread it to all of the edges of your dough.
With a pizza cutter or a knife, cut your rolled out dough into 4 inch x 3 inch rectangles. You should have 20 rectangles total after cutting your dough.
Place rectangles on top of one another creating a stack. Place stack into loaf pan. See video below.

Place into a plastic bag and tie the ends (creating a great proofing environment) or loosely cover with plastic wrap. Set aside and let proof for 6 hours or overnight in the fridge.
When ready to bake; preheat your oven to 375 degrees. If you proofed your bread in fridge overnight, bring out to room temperature while the oven preheats.
Remove loaf from bag or plastic wrap and place into your oven. Bake for 45-50 minutes.
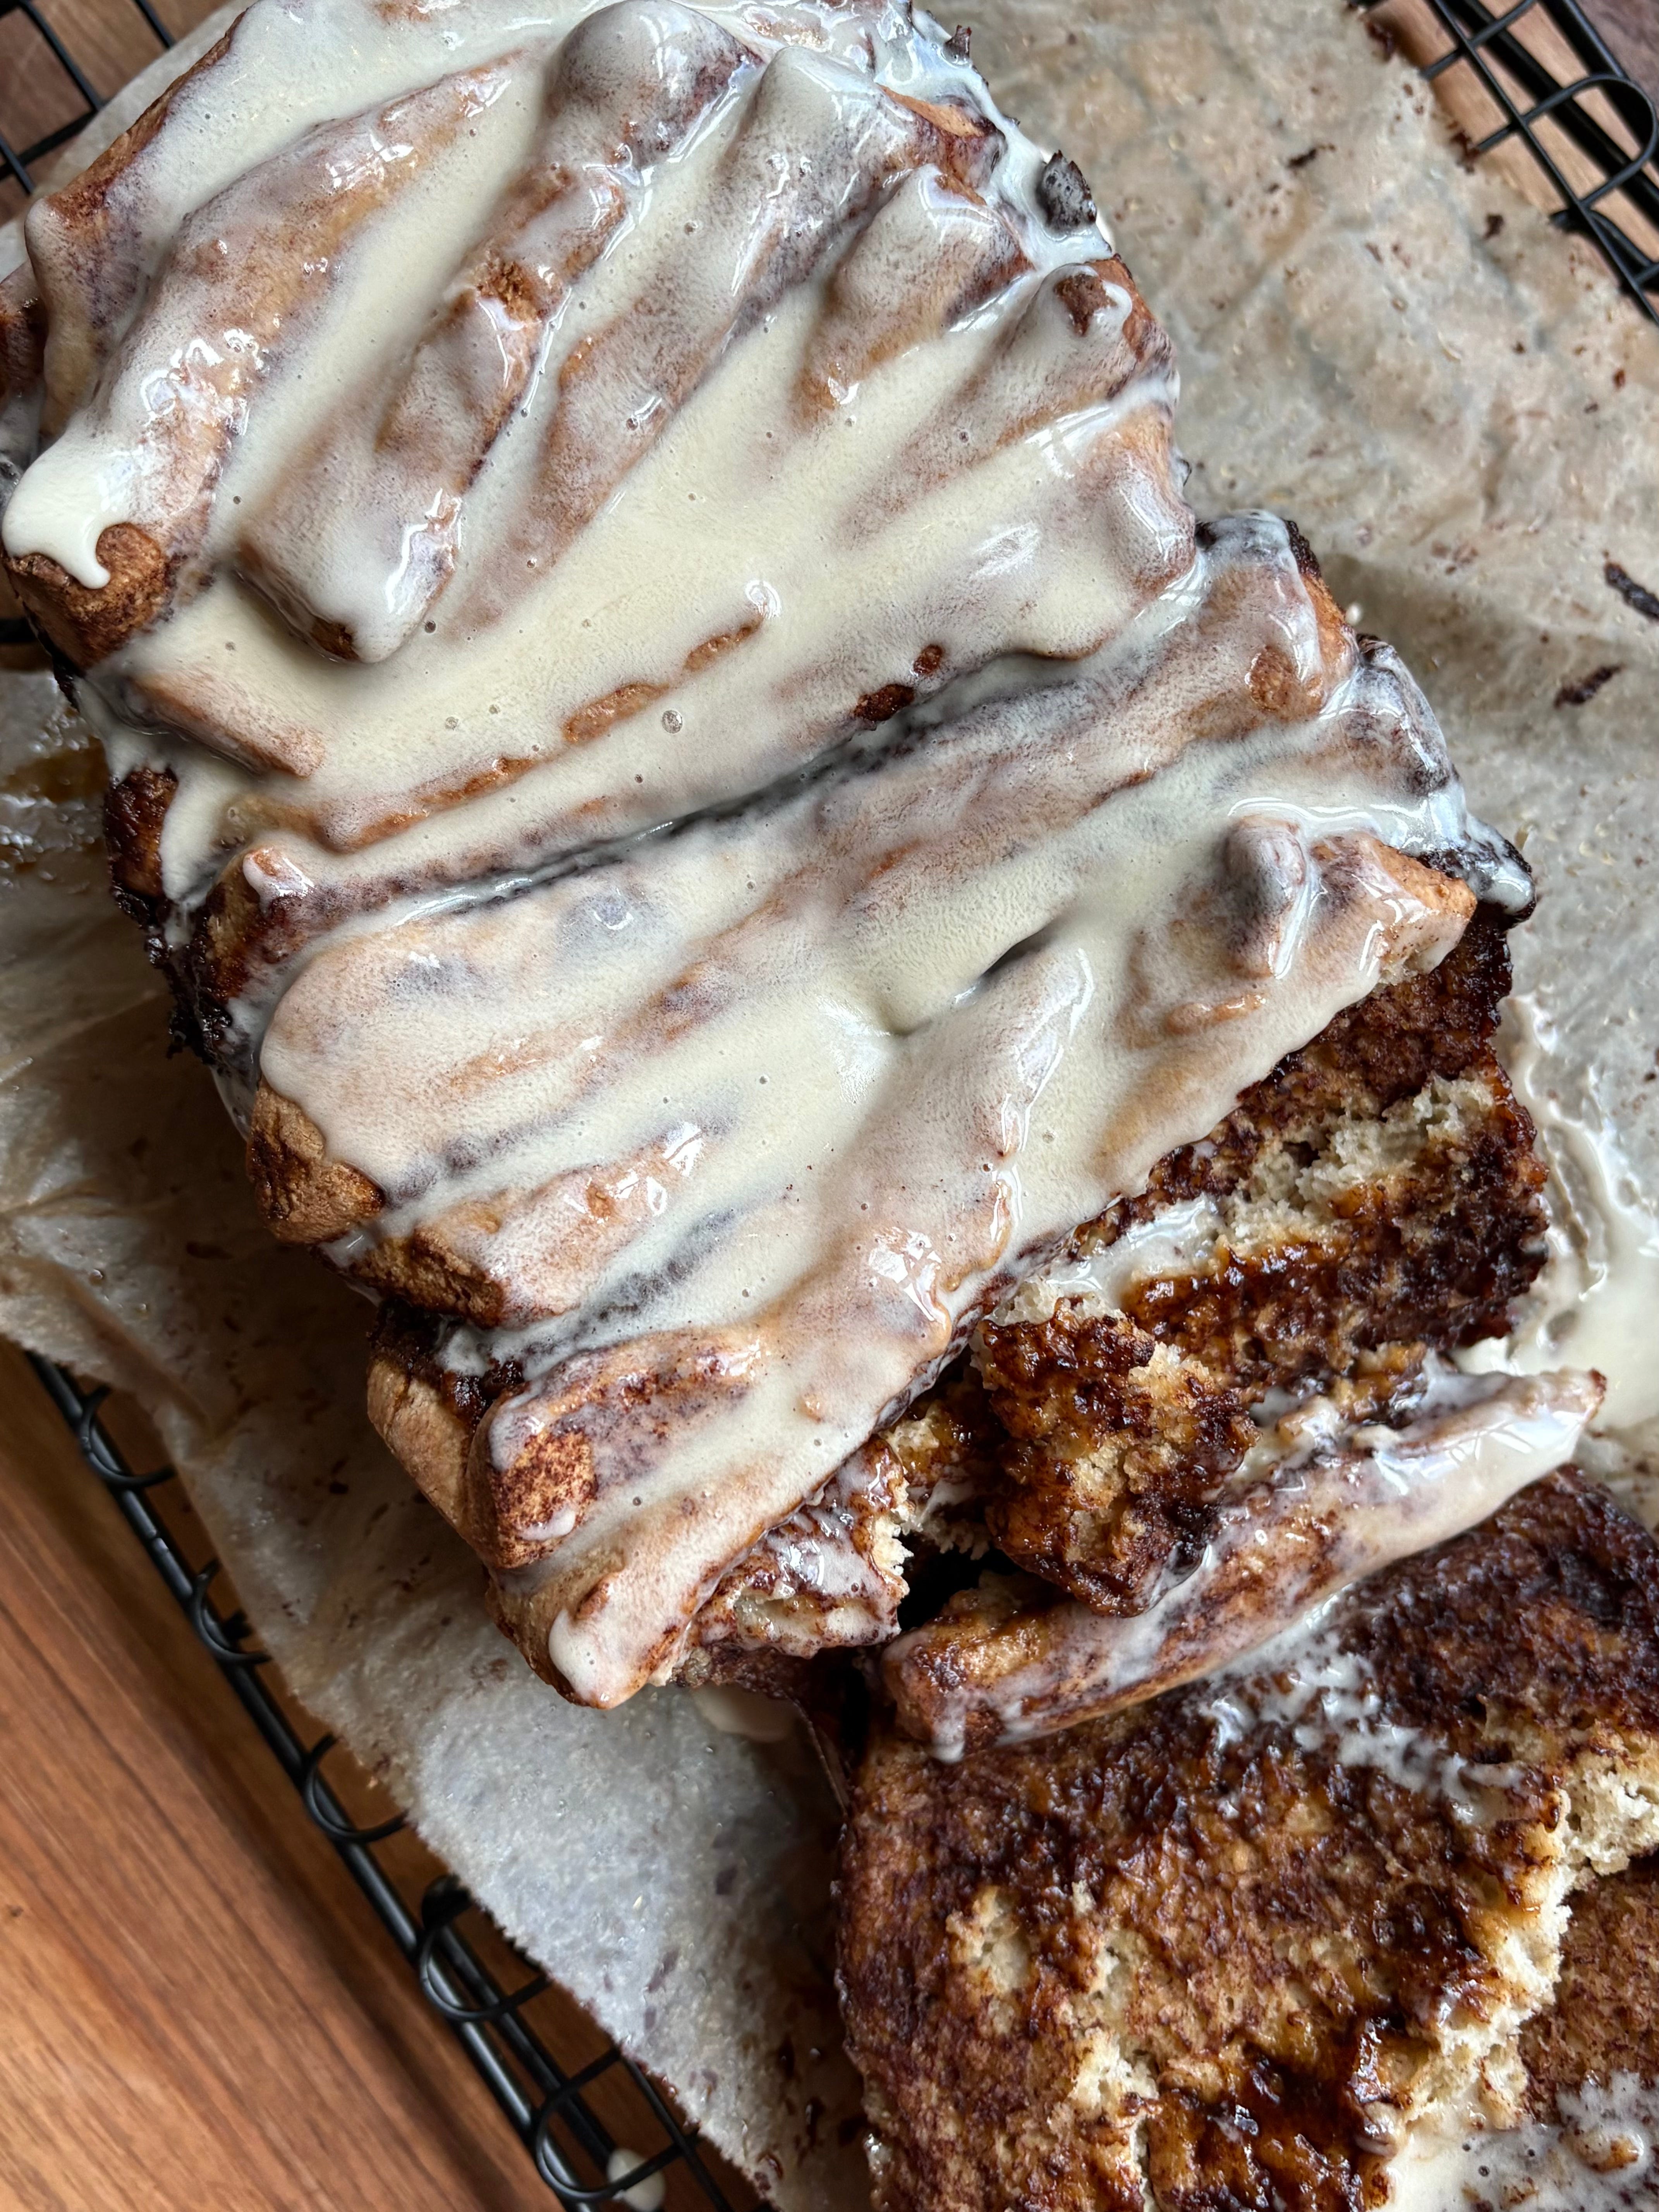
Remove from oven and let cool for at least an hour. This helps the bread set and not fall. Your bread should be golden brown when finished baking.


Mix together your icing. You want a nice “pourable” consistency, but not too thin. You want your icing to stick to your bread.
Pull loaf out from pan using the parchment paper and drizzle with your icing.
Serve and enjoy the heck out of it!
I am happy to answer any and all questions, so don’t hesitate to reach out. If you have any questions, the chat is a great place to go for help if you are a paid subscriber. Don’t forget to tag me in your creations over on Instagram. Let’s stay social, share your bakes with me!
Happy Baking!
With gratitude,
Idris Craft
